Course Creation on KnowxBox: User Manual
1. Create a Blank Course
Accessing KnowxBox Dashboard
- Open a web browser and enter the KnowxBox portal URL.
- The login page will be displayed.
- Enter valid Manager credentials (Username and Password).
- Click on the Login button.
- Upon successful authentication, the KnowxBox Dashboard will be displayed.
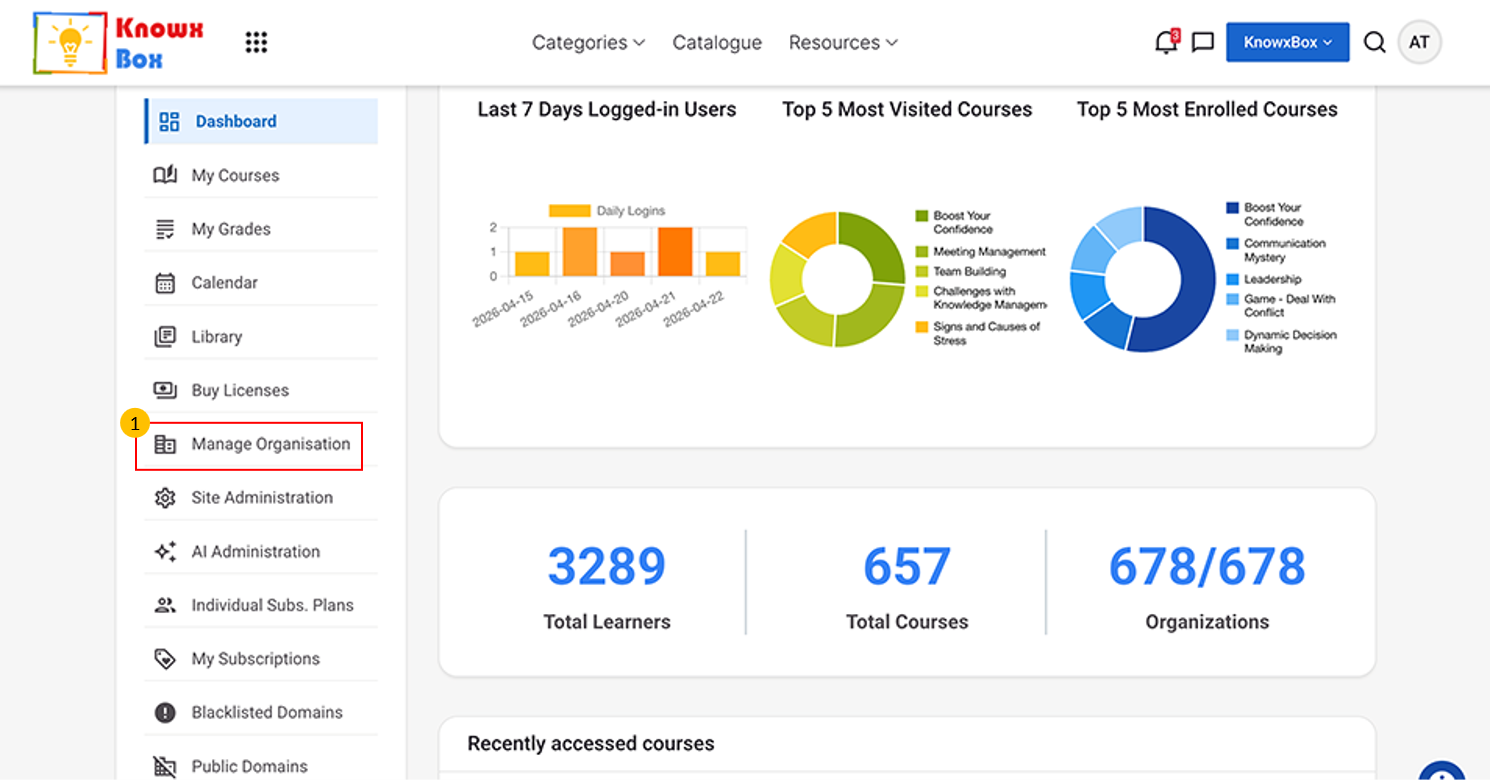
This is KnowxBox Dashboard view.
- Select Manage Organisation option.
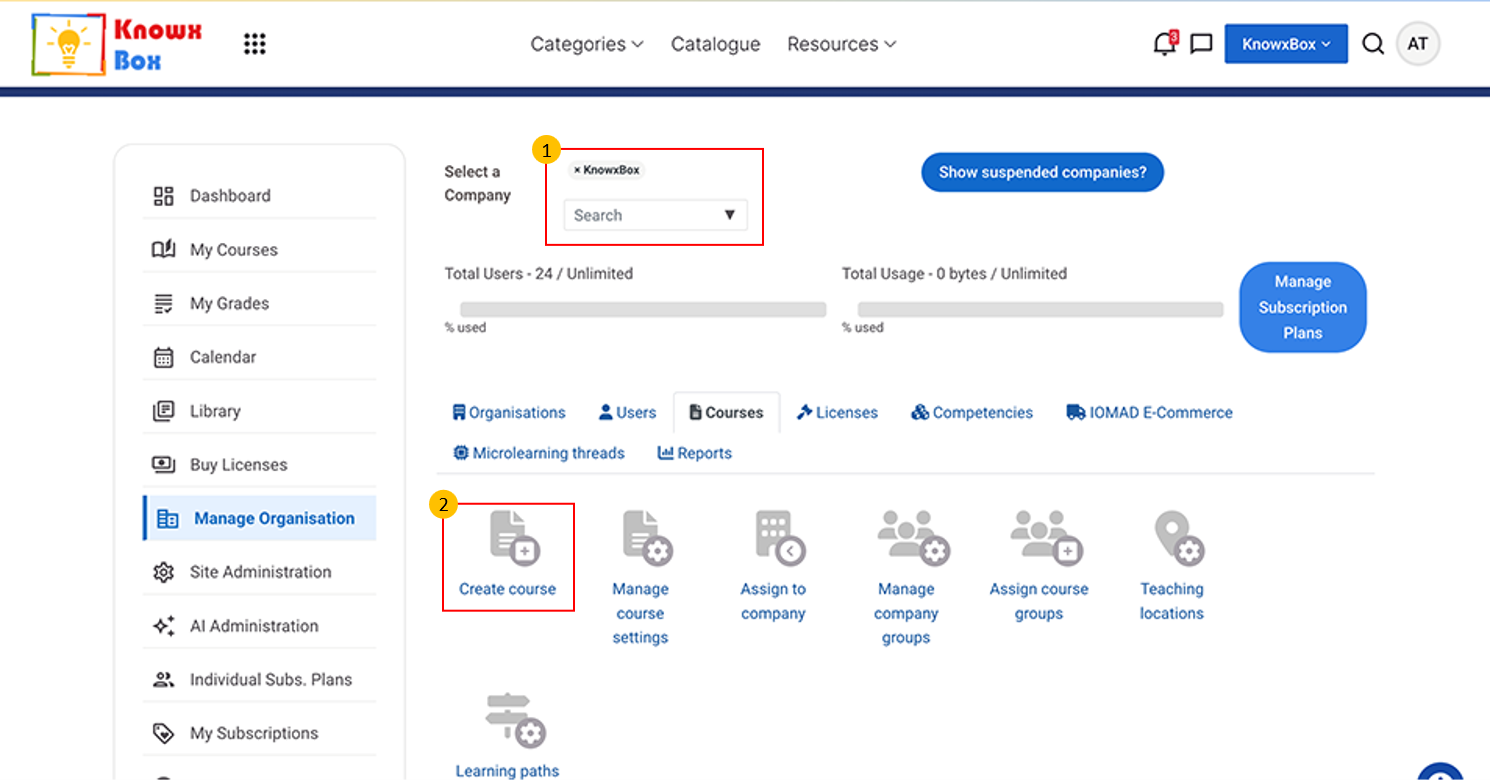
- Make sure the company selected must be KnowxBox here.
- Now, Click Courses option then Select Create Course.
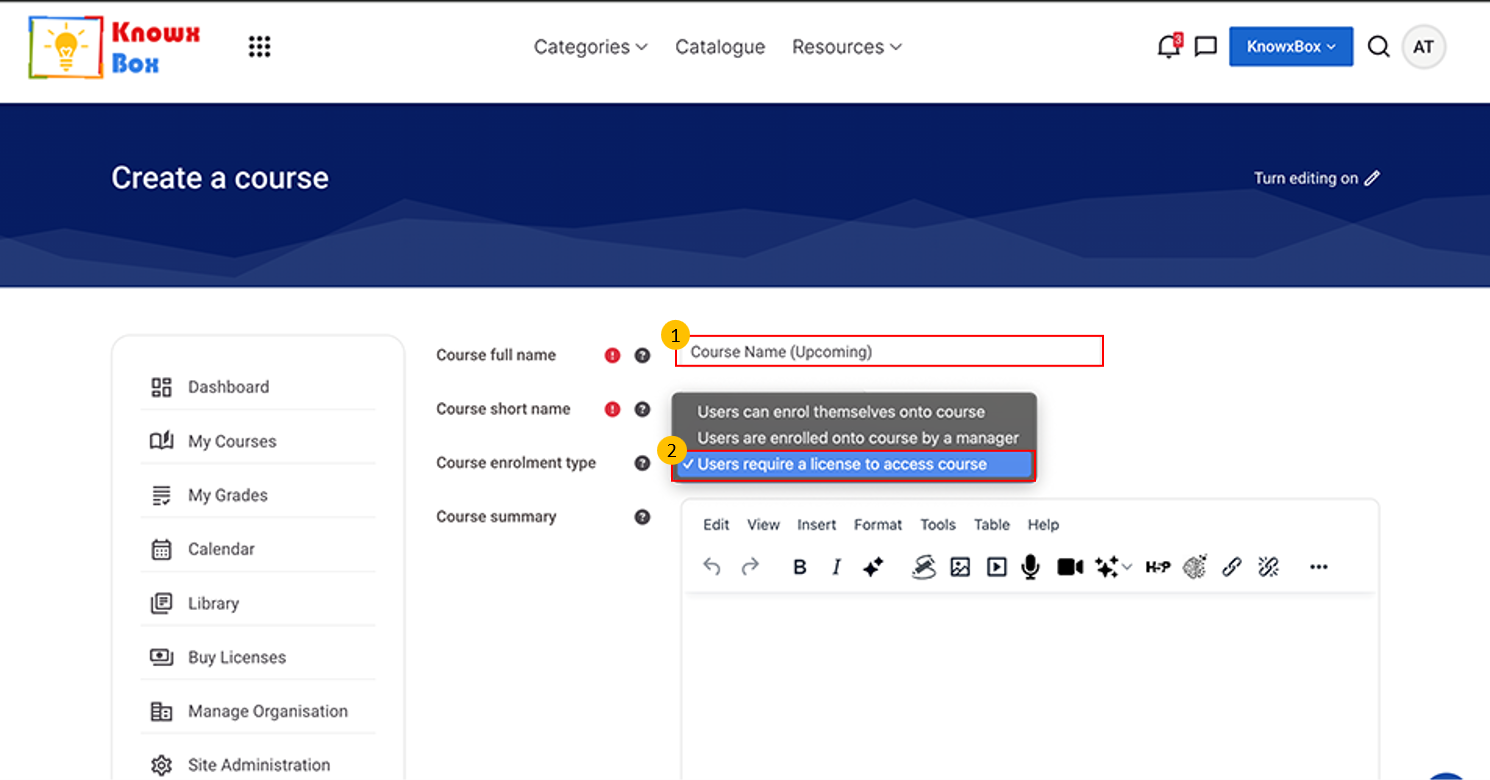
Fill the required fields:
- Course name - Mention Upcoming followed by course name e.g. Time
- Management (Upcoming)
- Course Short Name
- Course enrolment type - Select Users Require a license to access course in course enrolment type field
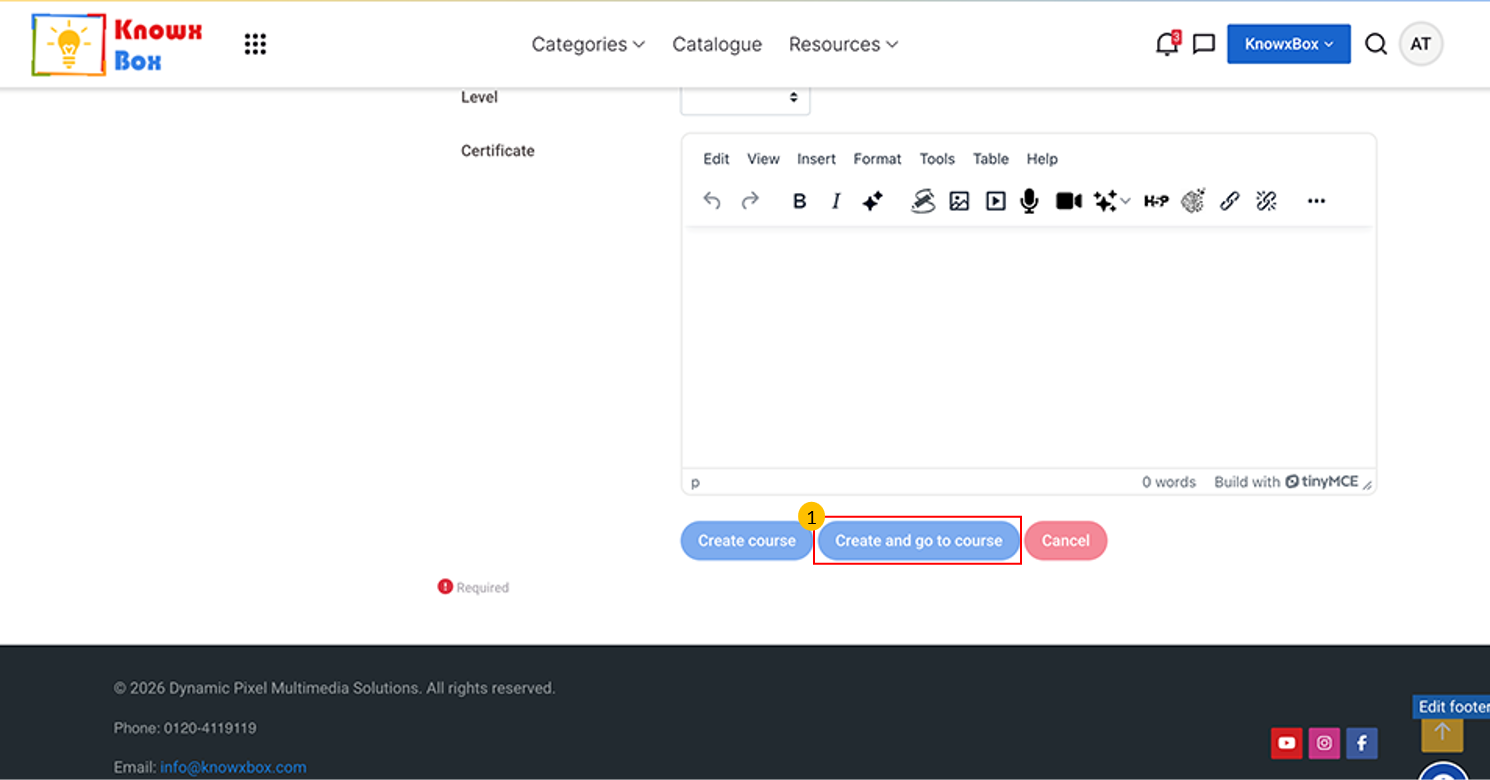
- Click Create and go to Course.
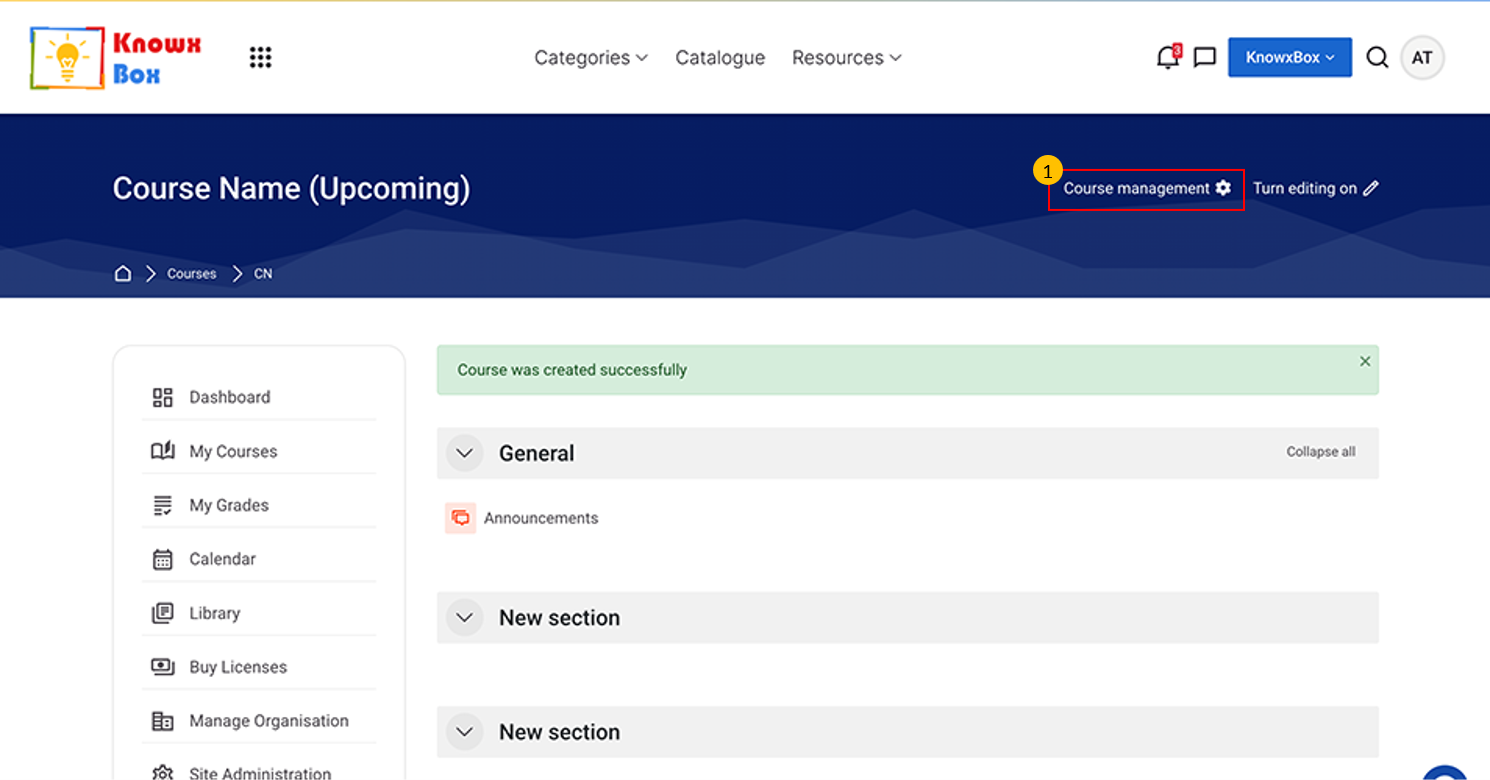
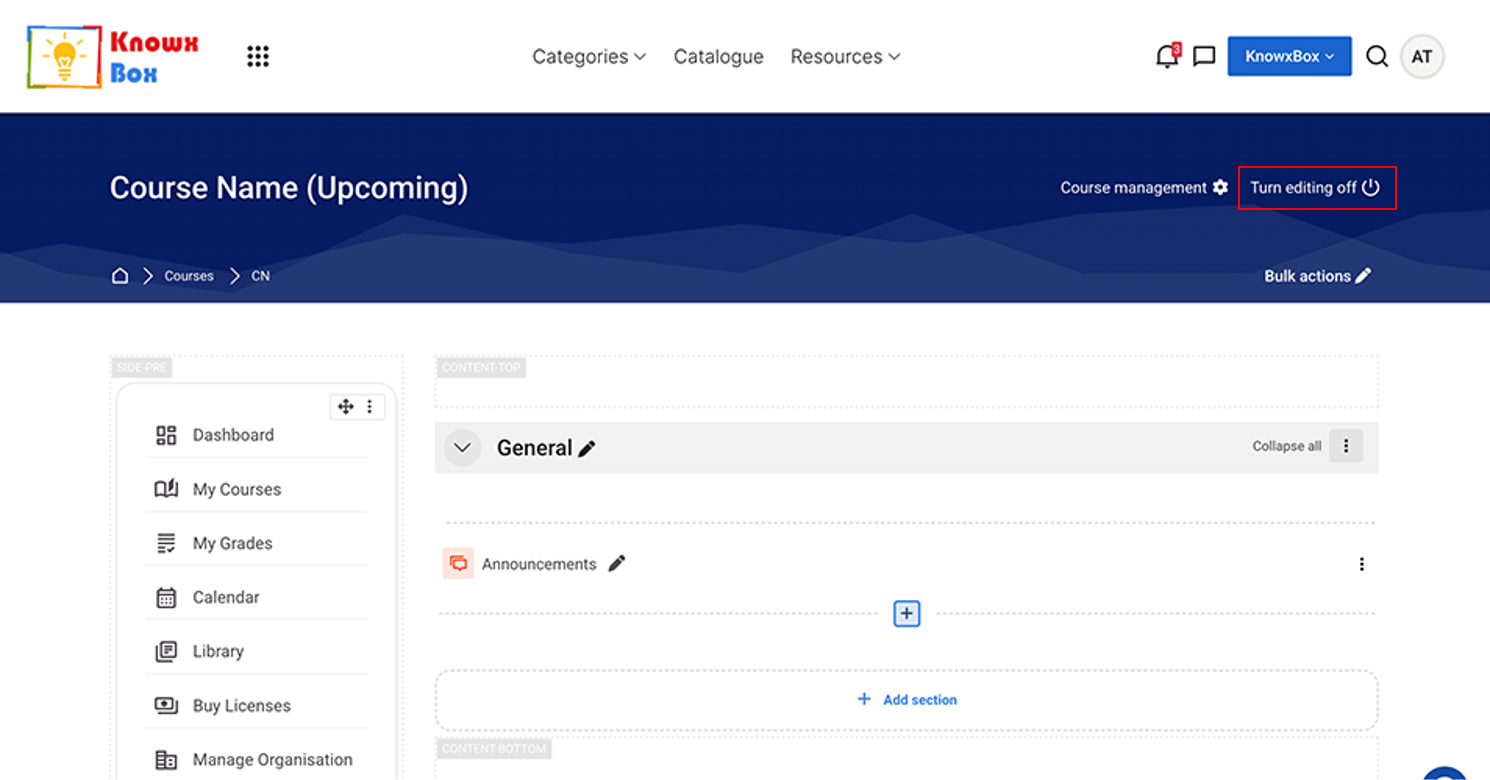
- Our course outer layer is created.
- Now, Click on Course Management.
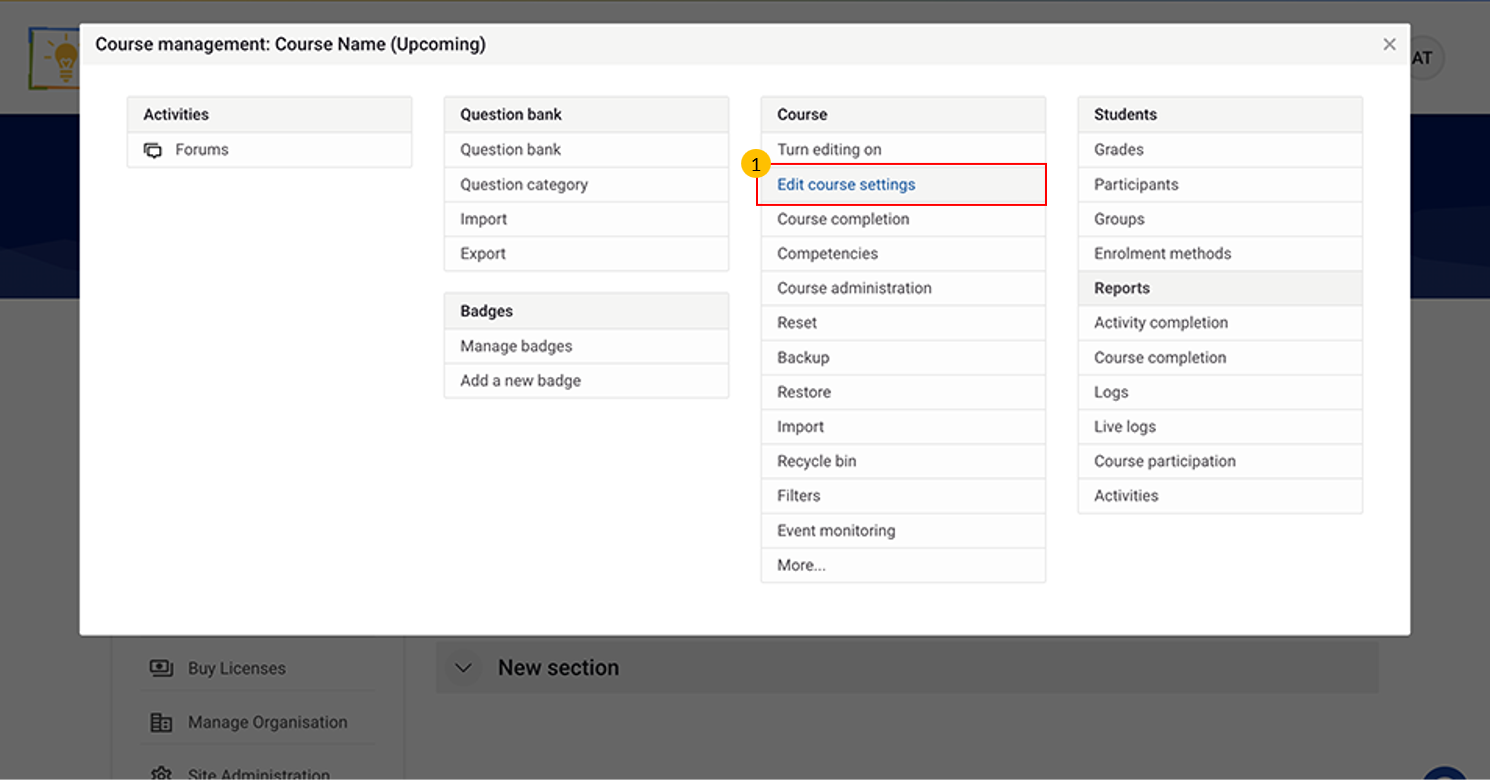
- Go to Edit Course Setting.
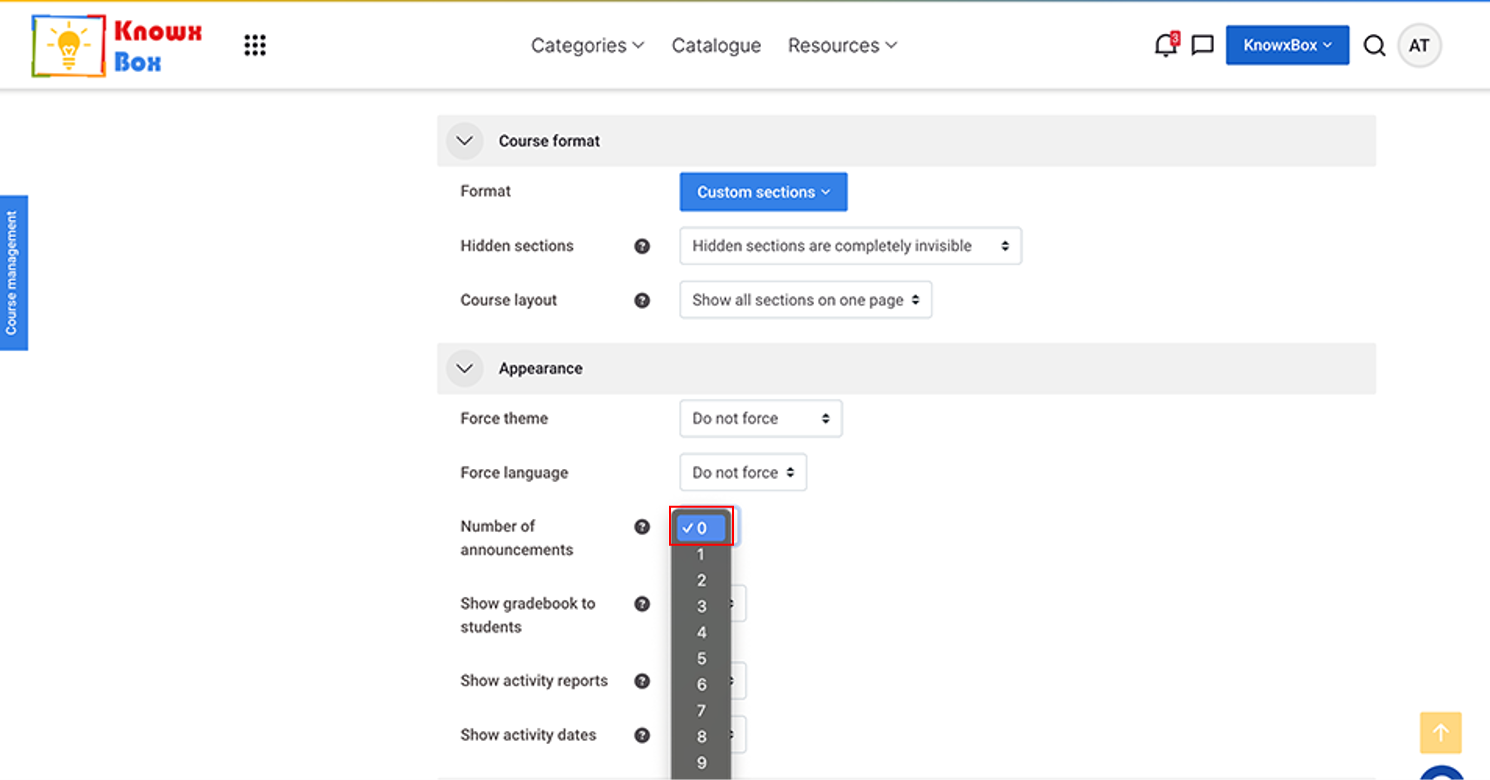
- Set Number of announcement to Zero.
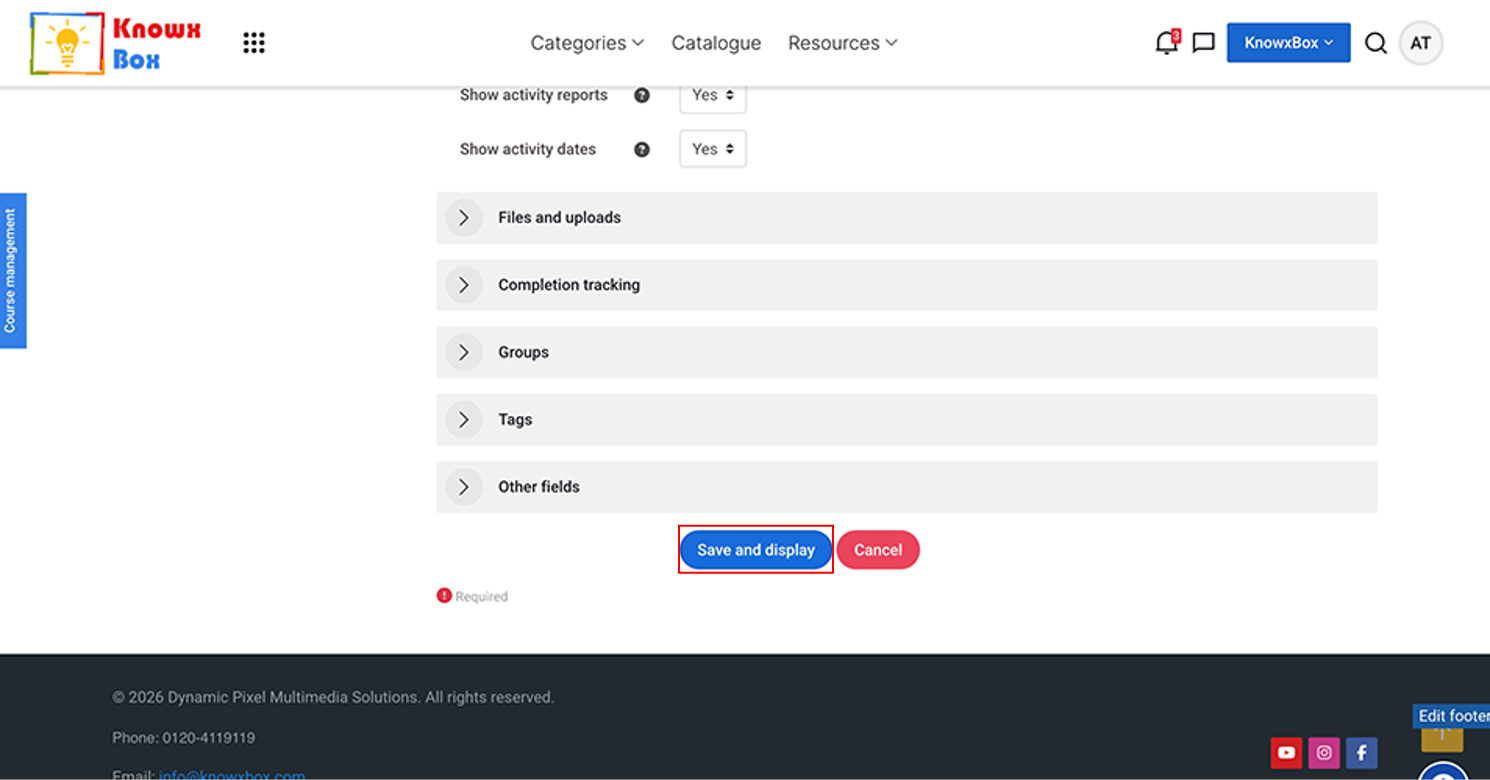
- Now Click on Save and display.
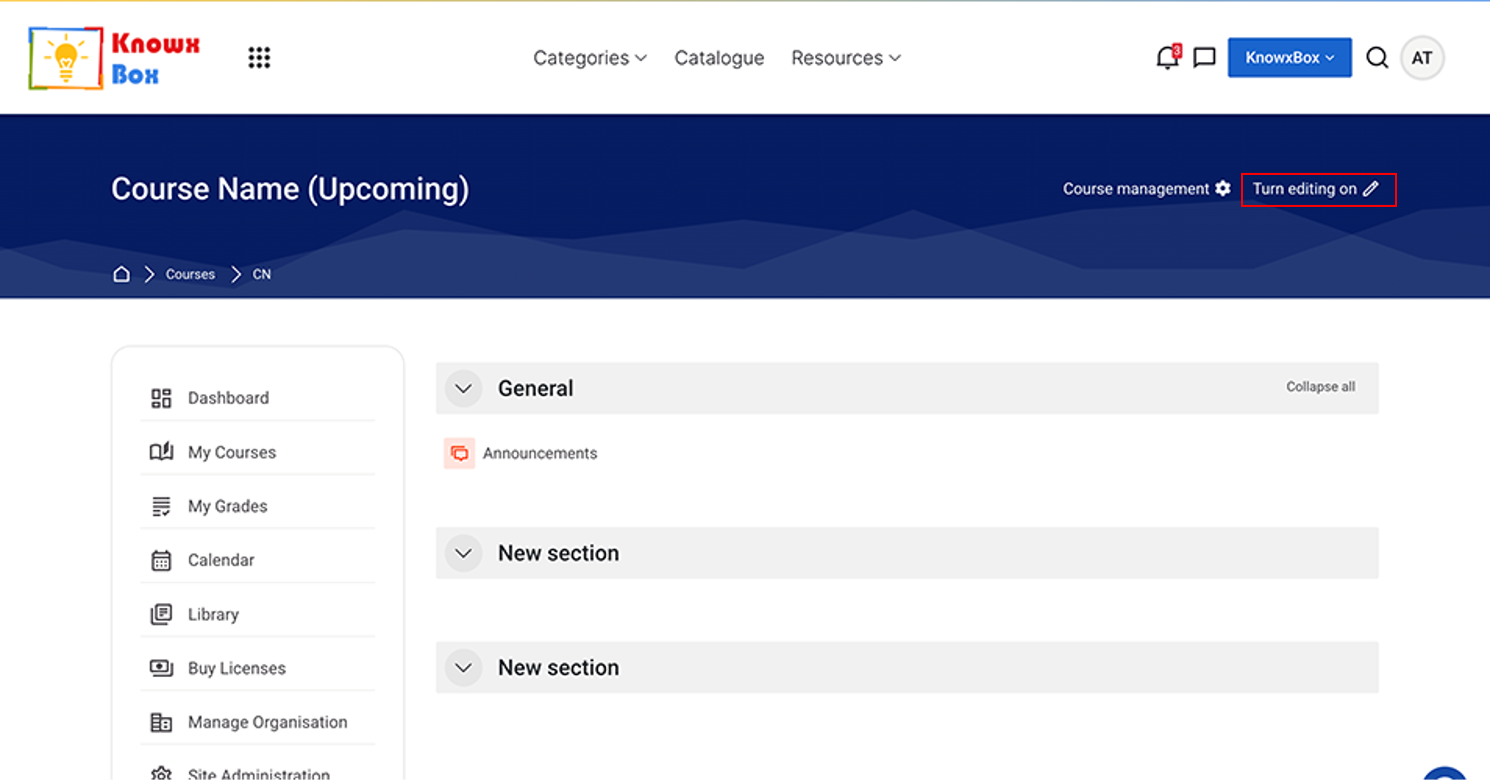
- Ensure that ‘Turn Editing On’ is enabled.
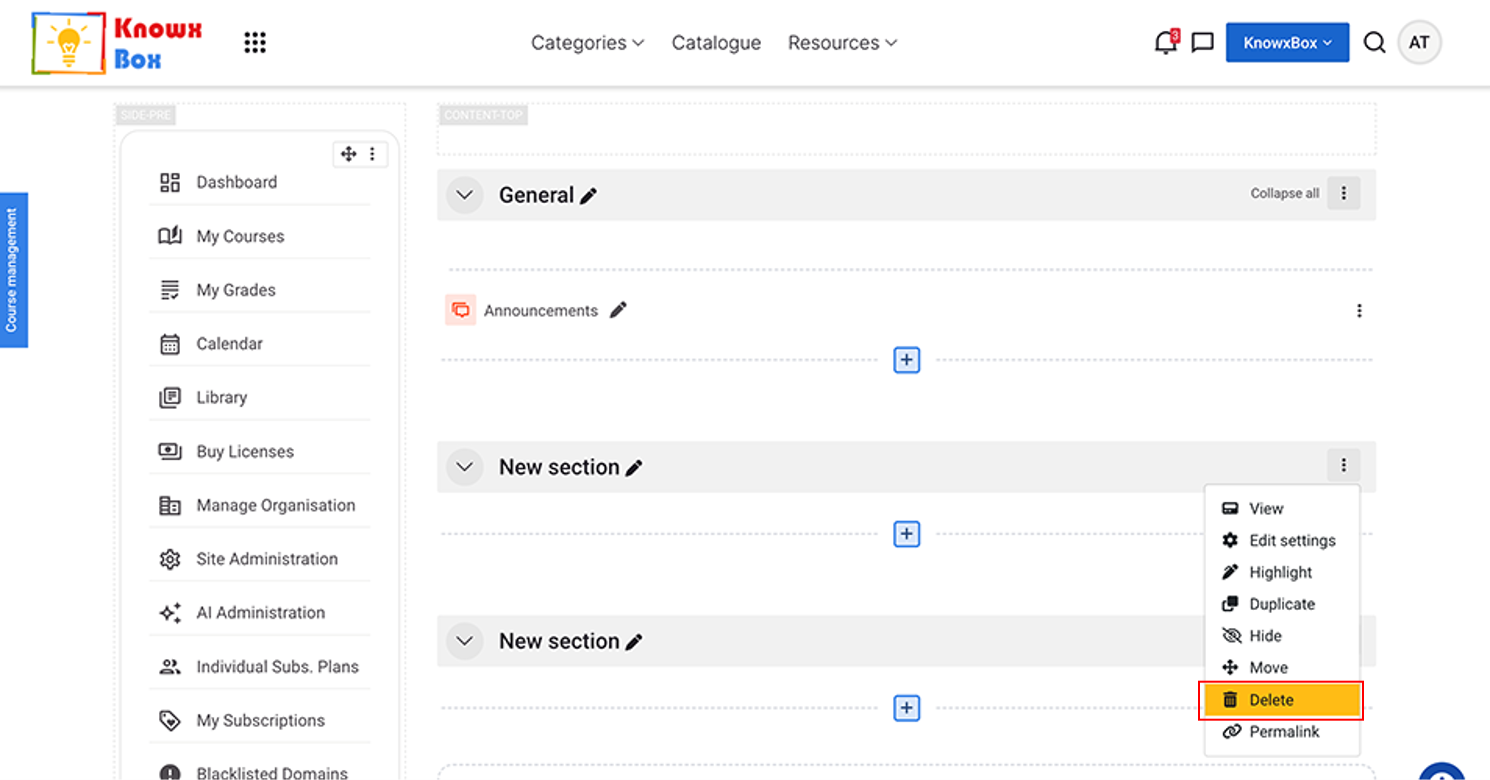
- Delete New sections by clicking the 3 vertical dots on the right-side then select Delete.