HACC Gen Extender using in Customization
| Site: | Dynamic Pixel Demonstration Environment |
| Course: | Moodle Documentation for Teacher |
| Book: | HACC Gen Extender using in Customization |
| Printed by: | Guest user |
| Date: | Sunday, 25 October 2026, 7:10 PM |
1. Course Content
HACC Extender is a plugin that is used to add multimedia to the content and perform the customization. It provides various tools to do the customization.
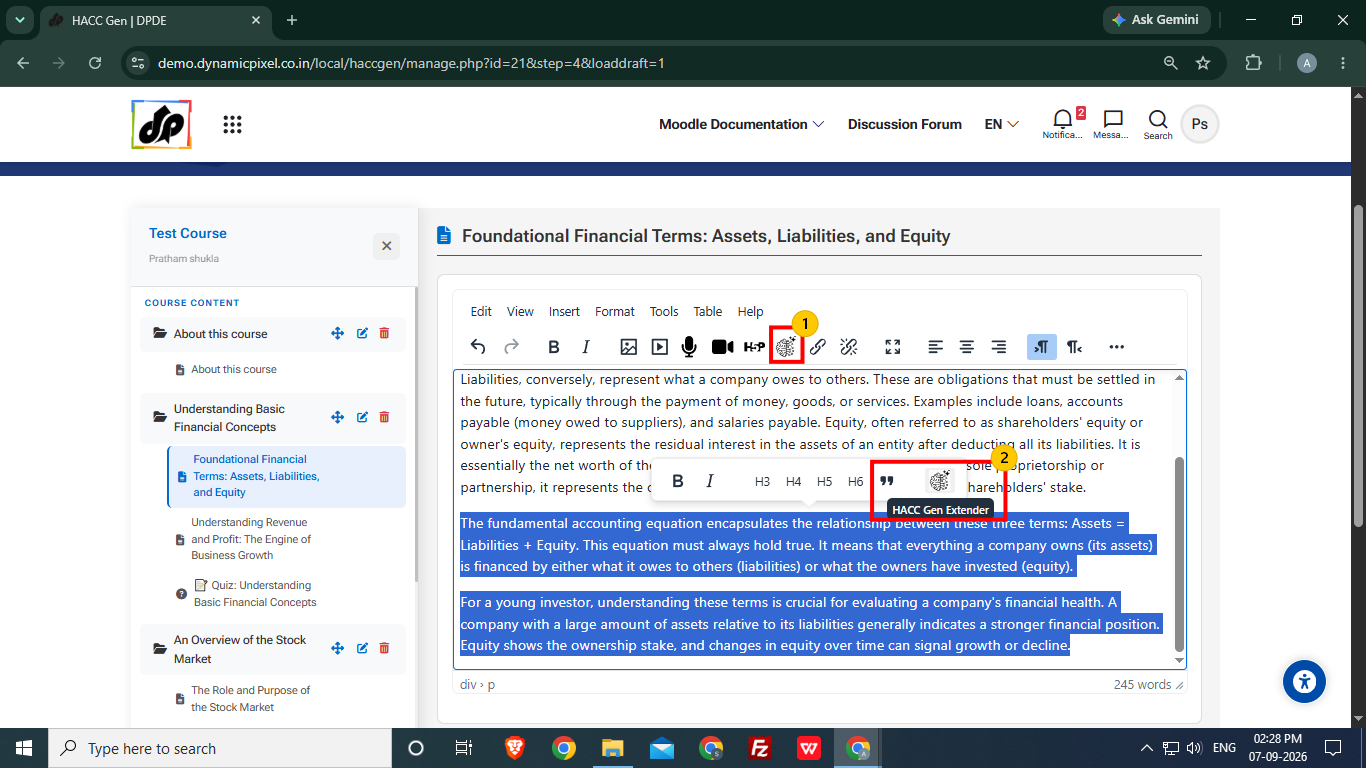
- Select the HACC Gen icon from the toolbar to do the customization.
- User can select particular part of content and the HACC Gen Extender option will be available for customization.
2. HACC Gen Extender
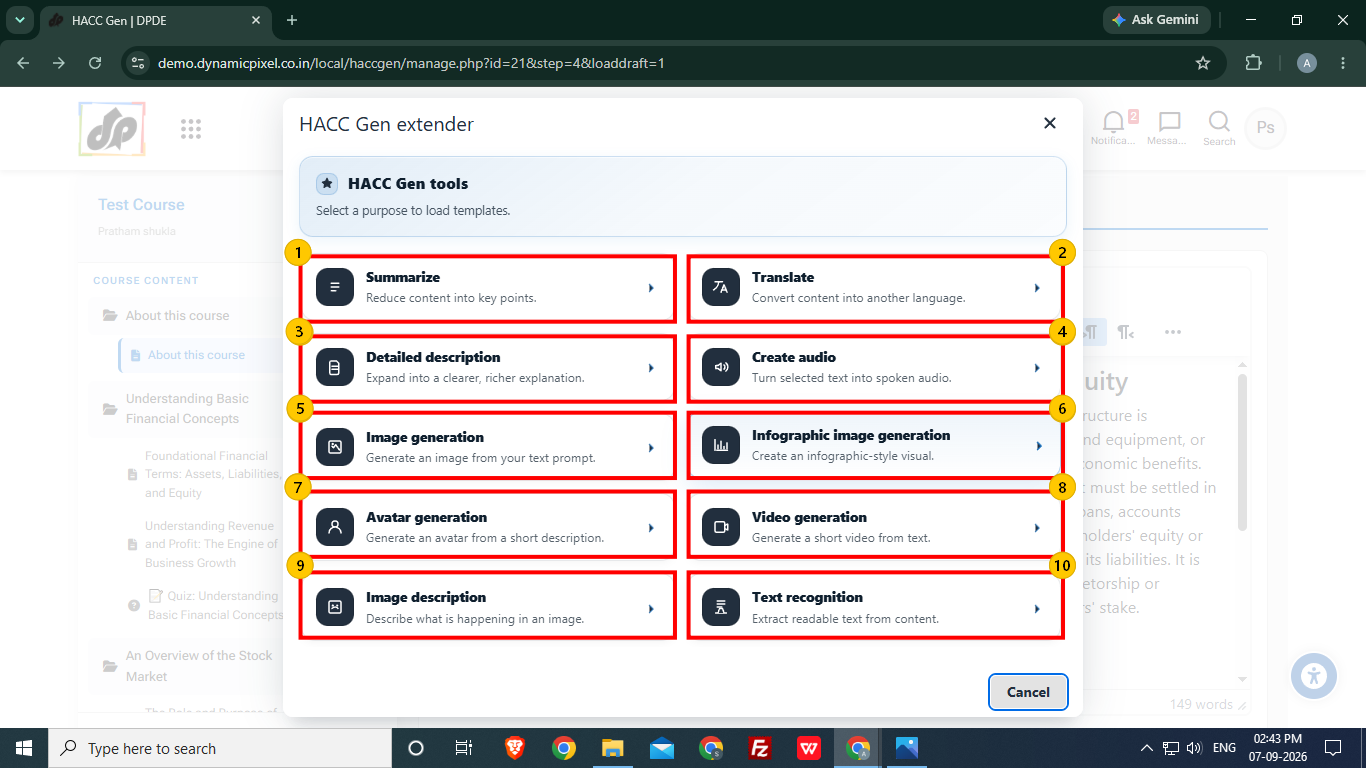
After selecting the HACC Gen Extender option, user will see the HACC Gen Tools option to do the customization. User can choose the type of customization they want in the content.
- Summarize: The content is reduced into key points.
- Translate: Selected content can be converted into another language.
- Detailed Description: The content is expanded into richer explanation.
- Create Audio: Spoken audio is created using the selected text.
- Image Generation: Images can be generated through text prompt.
- Infographic Image Generation: It creates an infographic visuals through text prompt.
- Avatar Generation: It creates an avatar from short description.
- Video Generation: Short video can be generated using selected text.
- Image Description: It can generate description from the image.
- Text Recognition: It is used to extract readable text from content.
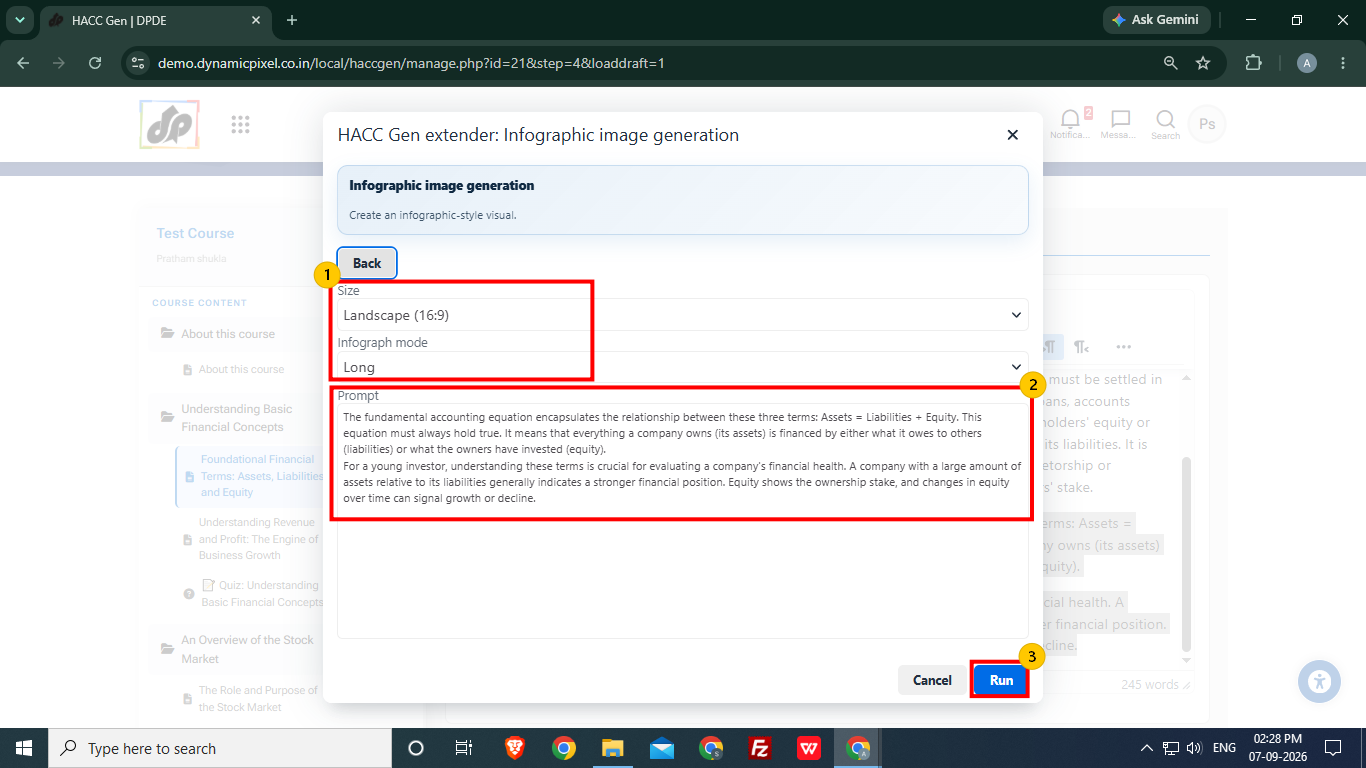
Let's say user chooses the Infographic Image Generation. Then user will have to select given details about the image to be generated.
- User can select the size of the image, i.e., Landscape, Portrait or Square and set info graph mode to long or Summarize.
- The selected part of the content will be given as prompt for infographic image generation, user can modify the prompt according to the requirements.
- After selecting the details, click Run to start the infographic image generation.
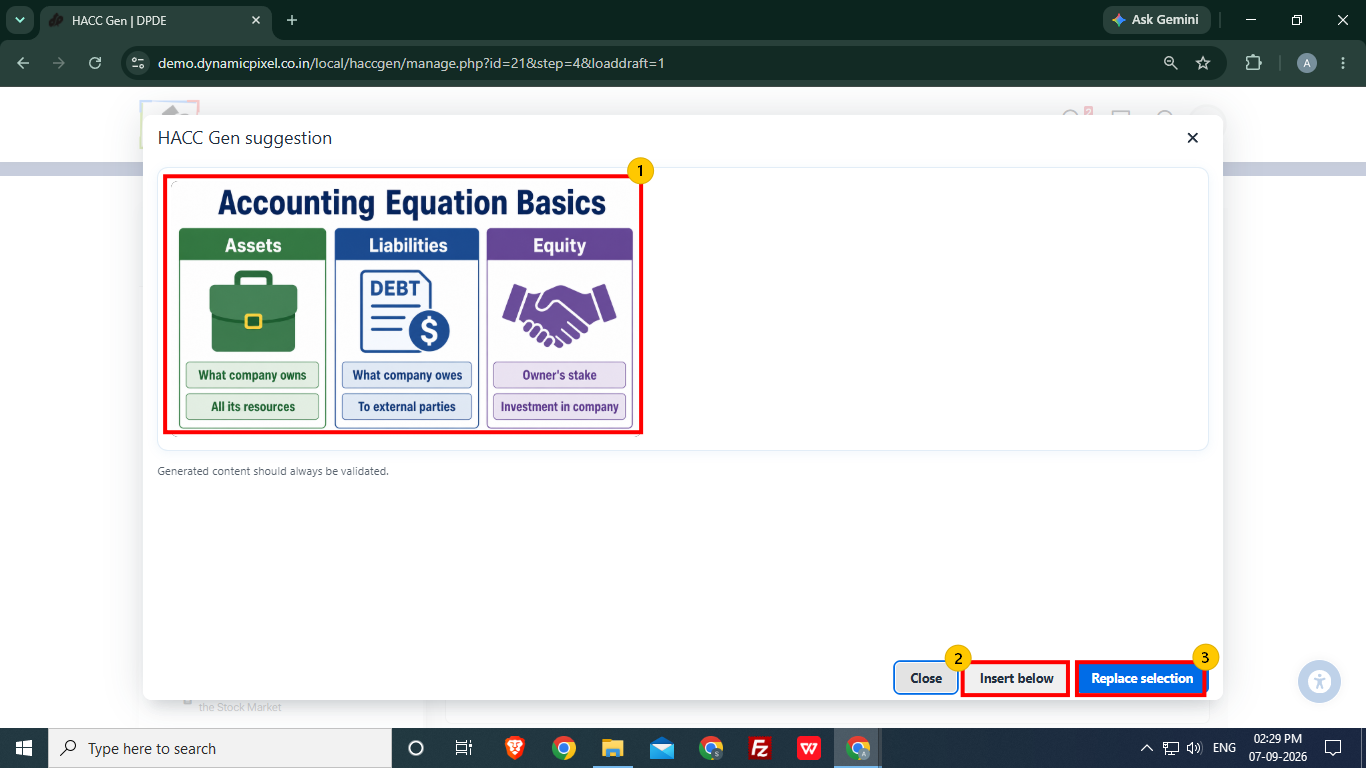
- The suggested image is generated for the user to view. If image doesn't fulfil the user's requirement, they can change the prompt and generate another image.
- User can added the image below the content using Insert Below option.
- The selected can be replaced by the generated image using Replace Selection option.
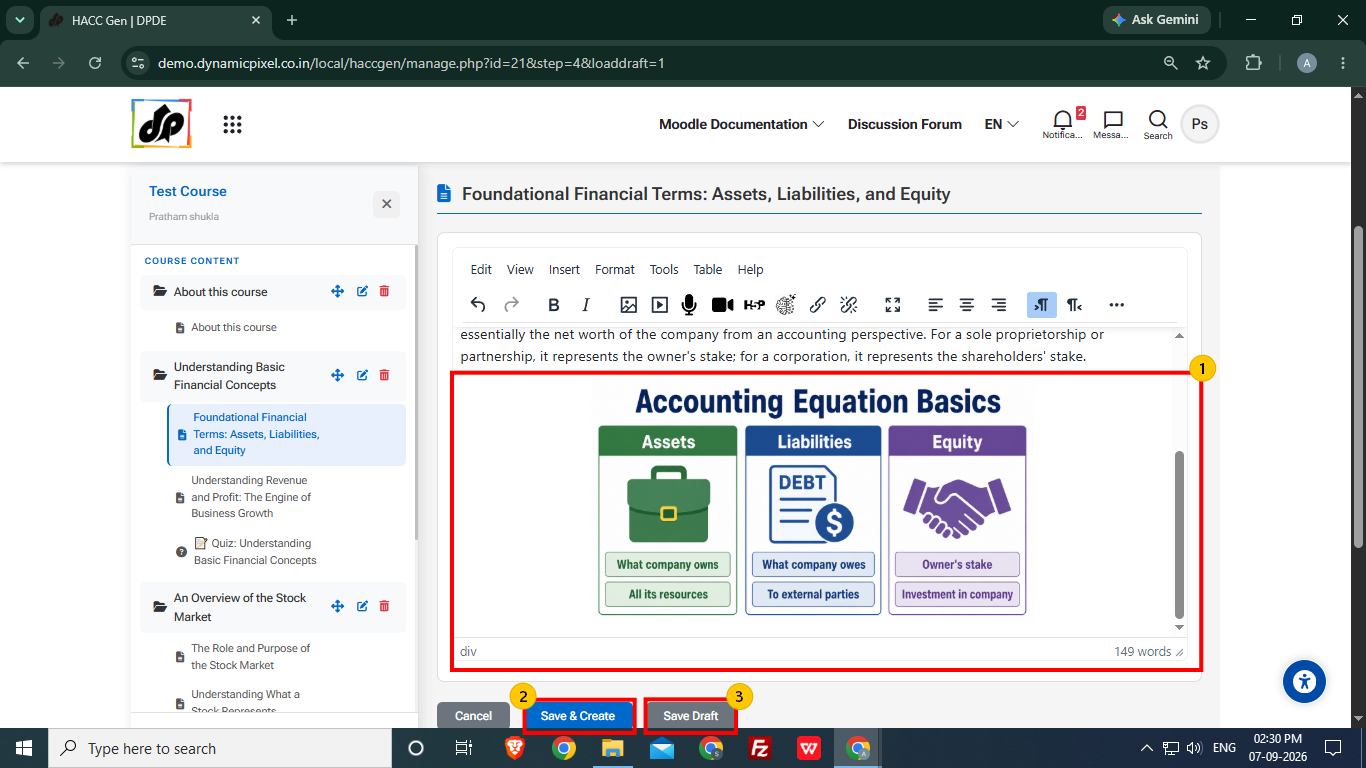
- The selected content is replaced by the generated infographic image. User can edit the size and position of the image according to the content.
- To create the course and add it to course section, select Save & Create option.
- To save the draft of the course, select Save Draft option. User can later access the course using Manage Draft option.